Upgrading Old Netgear Routers For Linux
Howto to use a Windows VM to upgrade outdated Netgear routers for Linux
Published on April 29, 2023 by Marcus Rickert
Netgear Linux Windows
3 min READ
Old Netgear routers such as the ProSAFE GS105E required the Windows executable ProSAFE Plus for configuration. By now, there is a new generation of tool (NETGEAR Switch Discovery Tool) available for Linux, Windows, and macOS. However, this tool requires a minimum version of the firmware. As I found out, the firmware of my routers were outdated. I don’t have a native Windows machine either which put me in a catch 22 situation.
This blog post explains how you can:
- use a Windows VM to access the router,
- install the new firmware under Windows,
- and finally use the new administration tool to configure the router under Linux.
Getting Access to the Router
The following steps assume that you have a Windows VM up and running on your Linux host. Also, the concrete description assumes a VM running under QEMU using the QEMU/KVM frontend. Other virtualization frameworks will most likely offer similar functionality, albeit with different names.
Installing a Suitable Interface
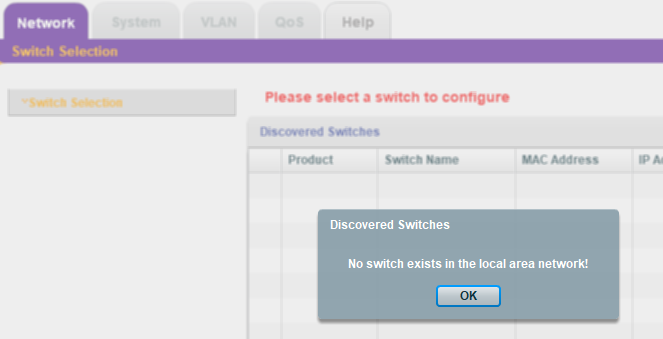
The first problem we are facing is the default choice of network interface that comes with the VM. This is usually a bridge device emulating a subnetwork with the VM getting one IP address in that network. Unfortunately, it is not possible to put the router into the same network which is a prerequisite for the router to be found by the ProSAFE Plus. So the naive approach to simply start the tool and hope for the best fails:
We have to use the network device type macvtap instead. We use the administration page of the VM to configure a second
network device:
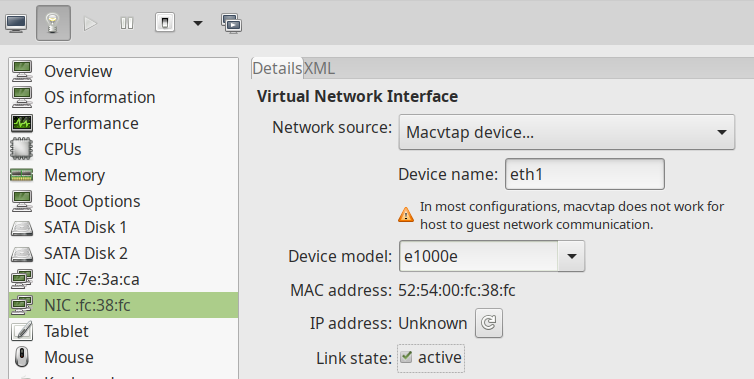
The setting Device name is important: This is the host network adapter that is connected to subnet with the
router! On my machine this is eth1. A more modern name would be, for example, enp6s0. After adding
the device you will have to reboot the VM. It will take you here:
Configuring the IP Address
However, when trying to log into one the device by choosing a product and clicking “Apply” you will get the message:
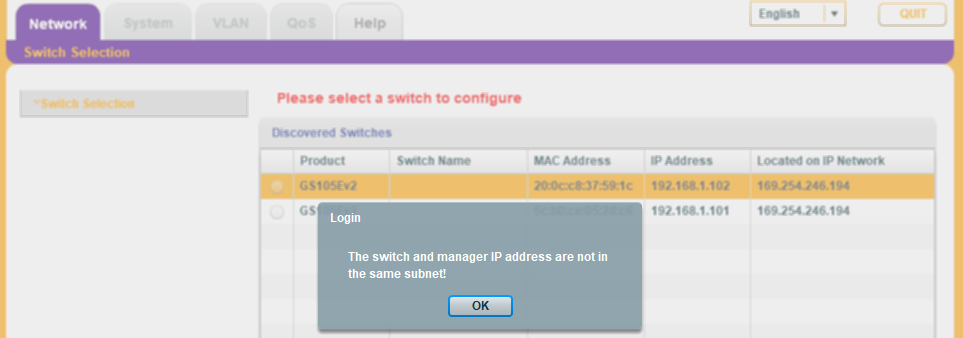
One way to fix this is to manually set the IP address of the network device by opening the network device settings of
your Windows VM. See this Microsoft Support Page.
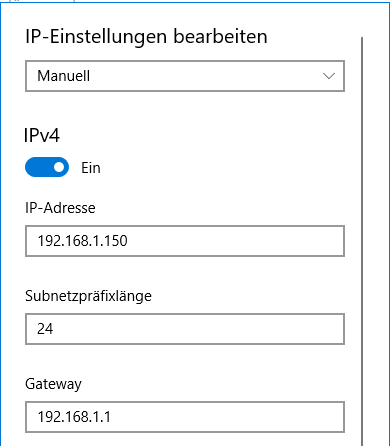
They are most likely set to “DHCP”. Change them to “Manual” and enter a free IP address (192.168.1.150 on my machine)
in the subnet of the router. The subnet prefix length will most likely be 24 bits.
You can ignore the DNS settings in this context.
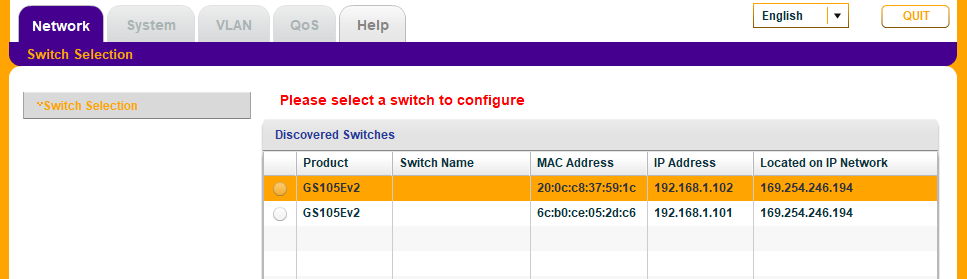
Reopen (or refresh) the configuration application, and you will the find routers to finally be in the same network as the configuration application:
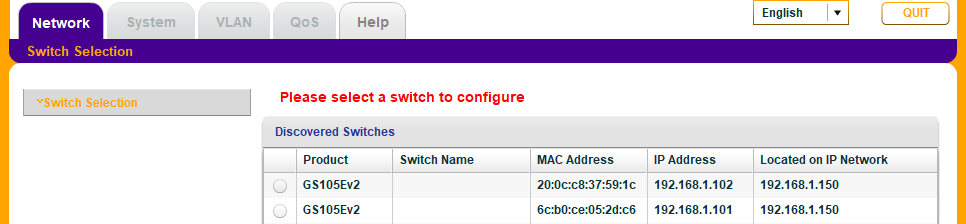
This will allow you to log into the device. If you have lost your password use the reset button on the back of the
device to reset the password to the default value password. After login go to System, Maintenance and
Firmware Upgrade. This will allow you to upgrade the firmware which you can download from the official Netgear
Download Page.
After installing the new firmware you will be able to log into the router using the web interface. Use the same password as before.
 .
.
You can now safely retire the Windows executable!